How to Mount the Grandstream GWN7610 WiFi Access Point
This day and age, it is hard to imagine a business that runs successfully without the Internet. It’s the lifeblood of any sustainable organization, and lately, it goes far beyond having a website and being able to send emails.
Most businesses need the Internet to function. If you are running an e-commerce business then having, or not having the Internet is life or death. If you are running a brick and mortar business, then chances are you use VoIP for your telecommunication needs.
These examples of how having the Internet for your business are extremely important, but the Internet dependability still goes even further! While the possibilities of what the Internet can do for your business are endless, this blog will stop at WiFi.
WiFi is so important these days. It enables most devices to access the Internet wirelessly! But sometimes WiFi signals can weaken if you are too far out of range. This is a big problem for multi-floor businesses and businesses that have large warehouses.
We all use WiFi to deliver the Internet to our cell phones and even our laptops, but more and more, we are seeing businesses using WiFi phones! For these businesses, it is imperative that there is a strong WiFi signal throughout the whole building.
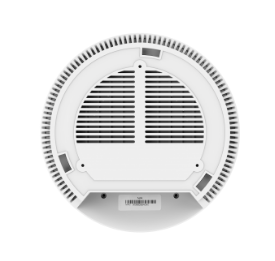
That is where the Grandstream GWN7610 WiFi Access Point comes in! This handy device can be installed to extend WiFi coverage to where you need it most, like your huge warehouse! If your warehouse employees are using WiFi phones to communicate to get the job done, then you may want to invest the GWN7610 to ensure great WiFi coverage.
This blog is not going to get into how to set up your GWN7610 or tell you how to configure it the way you want it. This is a Basic how-to blog, so today I am going to tell you how to physically mount your GWN7610, and guess what? It’s simple! Just follow these easy steps!
How to Mount the Grandstream GWN7610 WiFi Access Point
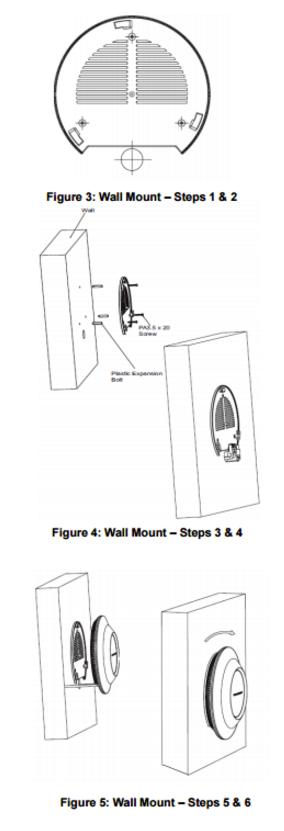
- Position the mounting bracket at the desired location on the all with the arrow pointing up.
- Use a pencil to mark the four mounting holes (screw holes DIA 5.5 mm)
- Insert screw anchors into the 5.5 mm holes.
- Attach the mounting bracket to the wall by inserting the screws into the anchors.
- Align the arrow on the GWN7610 with the arrow on the locking tab of the mounting bracket and ensure that your GWN is firmly seated on the mounting bracket.
- Turn the GWN clockwise until it locks into place and fits the locking tab.
And that’s it! Once you have this bad boy mounted, it will be up to your fantastic IT department to get it up and running! This process is also a very user-friendly and Grandstream has done a great job mapping it out in their user manual for you to understand.
Soon after your GWN7610 is working, you should notice a big difference in WiFi signal strength. Especially for the hard working people in the warehouse, or even the office workers that are stuck on the top floor of your building!
Do you use access points to extend your WiFi range? Do you use the GWN7610? If not, what are you using? We want to know!
**For those who find it easy to visually follow installation instructions, here’s a diagram!